thingsinjars

  • 19 Jul 2019

    Web Components vs Vue Components

    I've been doing a lot of work in Vue recently so when I was asked to evaluate using Web Components on an upcoming project, I approached it with a Vue-ish mindset.

    I've not really kept my eye on Web Components for the last couple of years beyond seeing original proposals being superceded and import specs being replaced. Just seeing those things on the periphery were enough to make me think "Meh... I'll have a look later when it's all died down".

    Now, I know that Web Components !== Vue. But, I was interested in what knowledge could be migrated from one technology to the other. If I were building an actual web app, I'd definitely use Vue. Building a boxful of reusable, shareable UI elements, though... let's find out.


    I'm not going to build anything too complex to start with. How about an "Planet Summary" panel? A simple panel that renders summary information about a planet given a JSON object.

    I have an API that returns JSON information about where in the sky to find planets when given your latitude and longitude. For example, if you're standing slightly south of the centre of Berlin and want to know where Venus is, you'd make this request:

    https://planets-api.awsm.st/venus/52.5/13.4

    And the response would be:

    
    {
      "name": "Venus",
      "number": 1,
      "colour": 1,
      "colleft": 24,
      "colright": 25,
      "alt": 13.043427032890424,
      "az": 290.3495756869397,
      "dec": 22.661411404345362,
      "ra": 110.21545618074397,
      "H": 98.18491228623316,
      "eclon": 108.59563862950628,
      "eclat": 0.5200939814134588,
      "illum": 0.9918628383385676,
      "r": 0.7192422869900328,
      "dist": 1.7155717469739922,
      "mag": -3.909377586961354,
      "elong": 0,
      "pa": 0,
      "p": 1,
      "description": {
        "altitude": "Barely above the horizon",
        "azimuth": "West"
      },
      "visible": false
    }
    

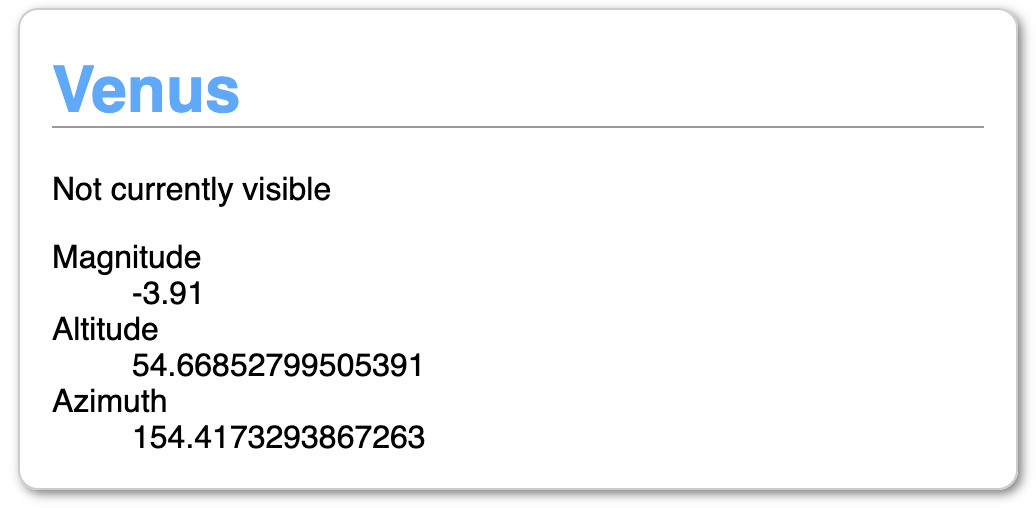
    In this case, it determines Venus isn't visible because, even though it's above the horizon, it's not bright enough given the time of day (about 6pm).

    We want to make a little UI card that displays this information.

    Planet panel

    Mapping Vue features to Web Components

    VueWeb ComponentNotes
    nameclass name
    datainstance properties
    propsattributesthese are not reactive by default. Attributes have to be specifically observed (see watch).
    watchattributeChangedCallbackfirst, register your watched attributes with `observedAttributes` then process them in attributeChangedCallback
    computedgetters
    methodsclass methods
    mountedconnectedCallbackcalled async so the component may not be fully ready or may have been detached. Use Node.isConnected to protect against calling a dead node
    componentWillUnmountdisconnectedCallback
    style blockstyle block inside templatestyles are scoped by default
    template blockliteral templateJS literal templates (backtick strings) are nowhere near as powerful for templating as an actual template library. Vue template features such as `v-for` can be replicated with vanilla JS but a single-purpose template library (such as `lit-html`) is a good idea.

    NOTE: I am deliberately not using Webpack. I realise that actual applications would be using additional tooling but I want to see what we can do without it.


    The first thing that clicked with me was when I realised that computed properties and getters are identical. Nice.

    Here's Vue code to return the planet name or a default string:

    
    computed: {
      name() {
        return this.planet.name || '';
      },
    }
    

    And Web Component:

    
    get name() {
      return this.planet.name || '';
    }
    

    Well, that was easy (and trivial).

    The same goes for defining the custom element for use in the DOM

    Vue:

    
    components: { 
      "planet-summary": PlanetSummary
    }
    

    Web Components:

    
    customElements.define("planet-summary", PlanetSummary);
    

    The only real difference at this level is the data binding. In Vue, props passed from a parent element to a child are automatically updated. If you change the data passed in, the child updates by default. With Web Components, you need to explicitly say you want to be notified of changes.

    This is basically the same as setting a watch in Vue. Data that changes in a slightly less tightly-bound fashion can be watched and the changes trigger updates further down.

    Watches

    Watches in Vue:

    
    watch: {
      altitude(newValue, oldValue) {
        ...
      }
    }
    

    With Web Components, registering a watch and reacting to changes are separate:

    
    static get observedAttributes() {
      return ['altitude'];
    }
    
    attributeChangedCallback(name, oldValue, newValue) {
      if(name === 'altitude') {
        ...
      }
    }
    

    Templating

    Vue contains full templating support – for loops, conditional rendering, seamless passing around of data. Natively, you have literal templates and that's about it.

    To create a list of planets, you'd use the v-for directive and loop over your planets array.

    Vue:

    
    <ul>
      <li v-for="planet in planets">
        <planet-summary :planet="planet"></planet-summary>
      </li>
    </ul>
    

    Web Component

    
    <ul>
      ${this.planets.map(planet => `
      <li>
        <planet-summary planet='${JSON.stringify(planet)}'></planet-summary>
      </li>
      `).join('')}
    </ul>
    

    The join is there because we're creating an HTML string out of an array of list items. You could also accomplish this with a reduce.

    Boilerplate

    With Web Components, your component lives in the Shadow DOM so you are responsible for updating it yourself. Vue handles DOM updates for you.

    Here is a basic render setup:

    
      constructor() {
        super();
        this._shadowRoot = this.attachShadow({ mode: "open" });
        this.render();
      }
      render() {
        this._shadowRoot.innerHTML = '';
        this._shadowRoot.appendChild(this.template().content.cloneNode(true));
      }
    

    This needs to be explicitly included in every component as they are standalone whereas Vue automatically handles DOM updates.

    CSS

    Due to the fact that Web Components live in a separate document fragment, There are complications around sharing styles between the host page and the component which are nicely explained on CSS Tricks. The biggest benefit, on the other hand, is that all styles are scoped by default.

    Vue without Webpack (or other tooling) also has its own complications around styles (specifically scoping styles) but if you're building a Vue application, it is much more straightforward to specify which styles are global and which are scoped.

    Summary

    Here is the Vue Planet Summary and the source of planet-summary-vue.js.

    Here is the Web Component Planet Summary and the source of planet-summary.js.

    Bonus: here's a Planet List Web Component which includes the Planet Summary component. And the source of planet-list.js

    All in all, pretty much everything between basic Vue Components and Web Components can be mapped one-to-one. The differences are all the stuff around the basic construction of the components.

    I'd say that if you're looking to build completely standalone, framework-free reusable components, you'll be able to accomplish it with the Web Components standard. You just might have a bit of extra lifting and boilerplate to deal with.

    On the other hand, if you're already planning on building a full web application with data management and reactive components, use the tools available to you.

    Geek, Development, CSS, Javascript

  • 14 Apr 2019

    I made a thing. Now what?

    Anyone who knows me knows I'm all about solving problems. That's my thing. There's a problem, here are the facts, here's the solution. It's almost always a technical solution.

    So when I was presented with the problem of making it easier to make background music for YouTube videos, I built Harmonious Studio.

    Technically, its a good solution – it lets you mix individual loopable instruments into a single track. Behind the scenes, it uses a the Web Audio API to manage the individual tracks in the browser and ffmpeg to prepare the final high-quality download.

    The question is: what now?

    The original plan was to allow others to upload their tracks and create a marketplace for music – basically positioning Harmonious Studio as "Shutterstock for Music". There are several options for this – monthly subscription for unlimited downloads, fee per premium track, fee per download.

    There are a few problems with this, however.

    1. Free is better

    There is a huge amount of free music available online. Every week there's a post on /r/gamedev where a composer gives away thousands of tracks for free. The majority of responses I got from the feedback form I asked for on Harmonious fell into the segment "Yes, I use background music. No, I'd never pay for it".

    2. Good enough is good enough

    The idea was that content creators would be able to make music to fit their content exactly. However, getting something instantly for free that almost fits is preferable to making something custom that costs time and money. Kind of obvious when you think about it.

    3. If it works, keep it

    The other piece of feedback I got from YouTubers was that, once they've found a piece of music that works, they're more likely to copy-paste it into the next video than get a new one. Once they've got 3 or 4 'go-to' tracks, they've got everything they need for most kinds of videos.


    So... what now?

    It's a good technical solution to a problem without a good market. This is usually the point where the insightful entrepreneur pivots and relaunches using the tech in a completely new way. Anyone have any suggestions about how to do that?

    Development, Geek

  • 6 Aug 2018

    HERE Tracking

    You'll have noticed I haven't updated much recently. Even when I did, if was with distinctly non-tech stuff. The reason being I've been busy. Not "I've got a big to-do list" busy or "I've had a couple of browser tabs open for a few weeks that I'll get round to eventually" busy, either. I've got a text-file to-do list that's been open, unsaved in the background since January 2017 and there are a couple of background tabs I've been meaning to get round to reading since late 2014. Really.

    What's been keeping me busy?

    Easy answer: HERE Tracking.

    A couple of years back, a few of us got interested in how IoT devices could work with location. What's the smallest, simplest device we can connect to the cloud and pin point on a map? Within a few weeks, we had a basic cloud and at CES in January this year, we launched a fully-fledged product. In that time, I've moved from 'prototyper who built version 0.1 on his laptop during the Christmas holidays' to something roughly equivalent to CTO of a medium-sized tech company. Not bad.

    What's it do?

    In essence, a small IoT device with some combination of GSM, WiFi and Bluetooth does a scan to find out what wireless networks, Bluetooth beacons and cell towers are visible and how strong they appear. They send their scan to HERE Tracking where it gets resolved into a latitude/longitude and then saved. The best bit is that it works indoors and outdoors.

    Look, we've even got our own shiny video with cheesy voiceover!

    And another that shows what it actually does!

    There are a bunch of other features as well such as geofences, notifications, filtering, etc. but the main focus is this large-scale ingestion and storage of data.

    At this point, our original Tracking team has grown to include HERE Positioning (the clever people who actually figure out where the devices are) and HERE Venues (we recently acquired Micello). By combining, the Tracking, Positioning and Venues bits together, we can follow one of these devices from one factory, across the country on a truck or train, overseas, into another country, into another factory, out into a shop... and so on.

    Development, Geek

  • 8 Jun 2015

    PrologCSS

    Seeing as both Prolog and CSS are declarative languages, I found myself wondering if it would be possible to create a mapping from one to the other. It was an interesting thought experiment that quickly found itself being turned into code.

    Way back when, Prolog was actually one of the first languages I learned to program in. It had been a while since I'd last used it for anything (a chess endgame solver in high school, I think) so I looked up an online tutorial. The following example is derived from section 1.1. of Learn Prolog Now

    Simple rules

    If you think of Prolog facts as denoting true/false attributes of elements, you can consider every known item in a KnowledgeBase (KB) as a DOM Element. For example:

    mia.
    

    Is equivalent to:

    <div id="mia"></div>
    

    While

    woman(mia).
    

    Equates to:

    <div id="mia" class="woman"></div>
    

    You can make multiple statements about an item in the KB:

    woman(jody).
    playsAirGuitar(jody).
    

    Which is mapped to:

    <div id="jody" class="woman playsAirGuitar"></div>
    

    You can then represent these facts using visual attributes:

    .woman {
      background: yellow;
    }
    .playsAirGuitar {
      border: 1px solid black;
    }
    

    The only real issue is that CSS values can’t be aggregated. If they could be, you could always use the same attribute (e.g. box-shadow) and combine them:

    .woman {
      box-shadow: 1px 1px 0 red;
    }
    .playsAirGuitar {
      box-shadow: 2px 2px 0 red;
    }
    

    You'd want this to render two box-shadows, one with a 1px offset and one with a 2px offset.

    Instead, you have to use a unique CSS attribute for each class of facts. However, for the simplest examples, It’s not too complicated...

    If you want to query the KnowledgeBase, you need to map a standard Prolog query such as:

    ?- woman(mia).
    

    Into the a different output mechanism: HTML.

    The response is visualised in HTML and CSS using the following rules:

    • There is an element with id "mia"
    • There is a class "woman"
    • The element with ID "mia" has the class "woman"

    In the demo below, you can read this by verifying that the #mia div has a yellow background. Done.

    Here's the complete KnowledgeBase for the first section of "Learn Prolog Now".

    <!-- woman(mia). -->
    <div id="mia" class="woman"></div>
    
    <!-- woman(jody). -->
    <!-- playsAirGuitar(jody). -->
    <div id="jody" class="woman playsAirGuitar"></div>
    
    <!-- woman(yolanda). -->
    <div id="yolanda" class="woman"></div>
    
    <div id="party"></div>
    

    And here are the queries that could be answered by looking at the visual output:

    ?- woman(mia). 
    Yes (the element with id="mia" has a yellow background)
    
    ?-  playsAirGuitar(jody).
    Yes (the element with id="jody" has a solid black border)
    
    ?- playsAirGuitar(mia).
    No (the element with id="mia" does not have a solid black border)
    
    ?- playsAirGuitar(vincent).
    No (there is no element with id="vincent")
    
    ?- tattooed(jody).
    No (there is no CSS style for a class '.tattooed')
    
    ?- party.
    Yes (the element with id="party" exists)
    
    ?- rockConcert.
    No (the element with id="rockConcert" does not exist)
    

    View the output

    More complex rules

    It starts to get tricky when you have rules depending on other values such as

    ?- happy(jody):- playsAirGuitar(jody)
    (“If jody plays air guitar, jody is happy”)
    

    But I think some clever element nesting could handle that.

    First, change the structure so that the classes/properties are on parent elements

    <div class="woman">
        <div class="playsAirGuitar">
            <span id="jody"></span>
        </div>
    </div>
    

    Make properties into divs and entities into spans

    Then update the structure of the rules:

    .woman span {
        background: yellow;
    }
    .playsAirGuitar span {
        border: 1px solid black;    
    }
    

    Now you can make rules dependent using the cascade. First, add the property:

    <!-- happy(jody):- playsAirGuitar(jody) -->
    
    <div class="woman">
        <div class="playsAirGuitar">
            <div class="happy">
                <span id="jody"></span>
            </div>
        </div>
    </div>
    

    Then create the rule:

    .playsAirGuitar .happy span {
        box-shadow: 1px 1px 0 red;  
    }
    

    The rule for happy(jody) will only be true (show box-shadow) if the rule for playsAirGuitar(jody) is also true.

    View the output

    Conclusion

    Sure, it's all a bit silly but it was quite a fun little experiment. There are probably a few big aspects of Prolog that are unmappable but I like to think it might just be possible to create a chess endgame solver using nothing but a few thousand lines of CSS.

    Ideas, Development, Geek

  • newer posts
  • older posts

Categories

Toys, Guides, Opinion, Geek, Non-geek, Development, Design, CSS, JS, Open-source Ideas, Cartoons, Photos

Shop

Colourful clothes for colourful kids

I'm currently reading

Projects

  • Awsm Street – Kid's clothing
  • Stickture
  • Explanating
  • Open Source Snacks
  • My life in sans-serif
  • My life in monospace
Simon Madine (thingsinjars)

@thingsinjars.com

Hi, I’m Simon Madine and I make music, write books and code.

I’m the Engineering Lead for komment.

© 2026 Simon Madine