-
-
RFID Timesheet
I've done a lot of projects over the holidays. This is a quick collection of notes to remind myself later.
I used an RC522 RFID scanner (originally part of a Tonuino project) and wired it to a Particle Photon. Whenever an RFID tag was held to it, it would publish an event containing the ID of the card to the Particle Cloud. When the card was removed, it would publish a blank event. This is the code from the Photon:
// Photon   RFID-RC522
//   A2         SDA
//   A3         SCK
//   A4         MISO
//   A5         MOSI
//   D2         RST
//   GND        GND
//   3V3        3.3V

#include
#include

#define LED_PIN     D7

constexpr uint8_t RST_PIN = D2;          // Configurable, see typical pin layout above
constexpr uint8_t SS_PIN =  A2;           // Configurable, see typical pin layout above

MFRC522 mfrc522(SS_PIN, RST_PIN);  // Create MFRC522 instance

uint32_t lastMillis = 0;
bool wasPresent = false;

void setup() {
    pinMode(LED_PIN, OUTPUT);
	Serial.begin(9600);		// Initialize serial communications with the PC
	while (!Serial);		// Do nothing if no serial port is opened (added for Arduinos based on ATMEGA32U4)
	SPI.begin();			// Init SPI bus
	mfrc522.PCD_Init();		// Init MFRC522
	mfrc522.PCD_DumpVersionToSerial();	// Show details of PCD - MFRC522 Card Reader details
	Serial.println(F("Scan PICC to see UID, SAK, type, and data blocks..."));
}

void loop() {
	// Look for new cards
	if ( ! mfrc522.PICC_IsNewCardPresent()) {
	    if(wasPresent) {
	        if(! mfrc522.PICC_IsNewCardPresent()) {
	          Serial.println("No card");
	          Particle.publish("rfid_scan", "", 60, PRIVATE);
	          wasPresent = false;
	        }
	    } else {

	    }
		return;
	}

	// Select one of the cards
	if ( ! mfrc522.PICC_ReadCardSerial()) {
		return;
	}

    char cardID[32] = "";

    for (byte i = 0; i < mfrc522.uid.size; i++) {
     char hex[4];
     snprintf(hex, sizeof(hex), "%02x", mfrc522.uid.uidByte[i]);
     strncat(cardID, hex, sizeof(cardID));
    }

    if (millis() - lastMillis < 1000) {
        return;
    }
    lastMillis = millis();

	if(!wasPresent) {
	    wasPresent = true;
	    Particle.publish("rfid_scan", cardID, 60, PRIVATE);
	    Serial.printlnf("Card: %s", cardID);

	    // Turn on the LED
	    digitalWrite(LED_PIN, HIGH);

	    // Leave it on for one second
	    delay(1s);

	    // Turn it off
	    digitalWrite(LED_PIN, LOW);

	    // Wait one more second
	    delay(1s);
	}

	// Dump debug info about the card; PICC_HaltA() is automatically called
	//mfrc522.PICC_DumpToSerial(&(mfrc522.uid));
}
I then used IFTTT to read these events and write them to a Google Spreadsheet. This is the IFTTT Excel code:
{{CreatedAt}} |||{{EventContents}}||| =IF(ISODD(ROW()), "Started", "Stopped") ||| =IF(ISEVEN(ROW()),ROUND(((DATEVALUE(REGEXEXTRACT(INDIRECT(ADDRESS(ROW(),COLUMN()-3,4)), "w+ d{2}, d{4}")) + TIMEVALUE(REGEXEXTRACT(INDIRECT(ADDRESS(ROW(),COLUMN()-3,4)), "d{2}:d{2}[A|P]M$"))) - ( DATEVALUE(REGEXEXTRACT(INDIRECT(ADDRESS(ROW()-1,COLUMN()-3,4)), "w+ d{2}, d{4}")) + TIMEVALUE(REGEXEXTRACT(INDIRECT(ADDRESS(ROW()-1,COLUMN()-3,4)), "d{2}:d{2}[A|P]M$")))) * 24, 2),"")|||
=IFERROR(VLOOKUP(INDIRECT(ADDRESS(ROW(), COLUMN()-3),4), I$3:J$10, 2, FALSE), "")
We now have a physical time tracker that can be used to log time spent on individual projects. Super-handy for Jenni's freelance work.
-
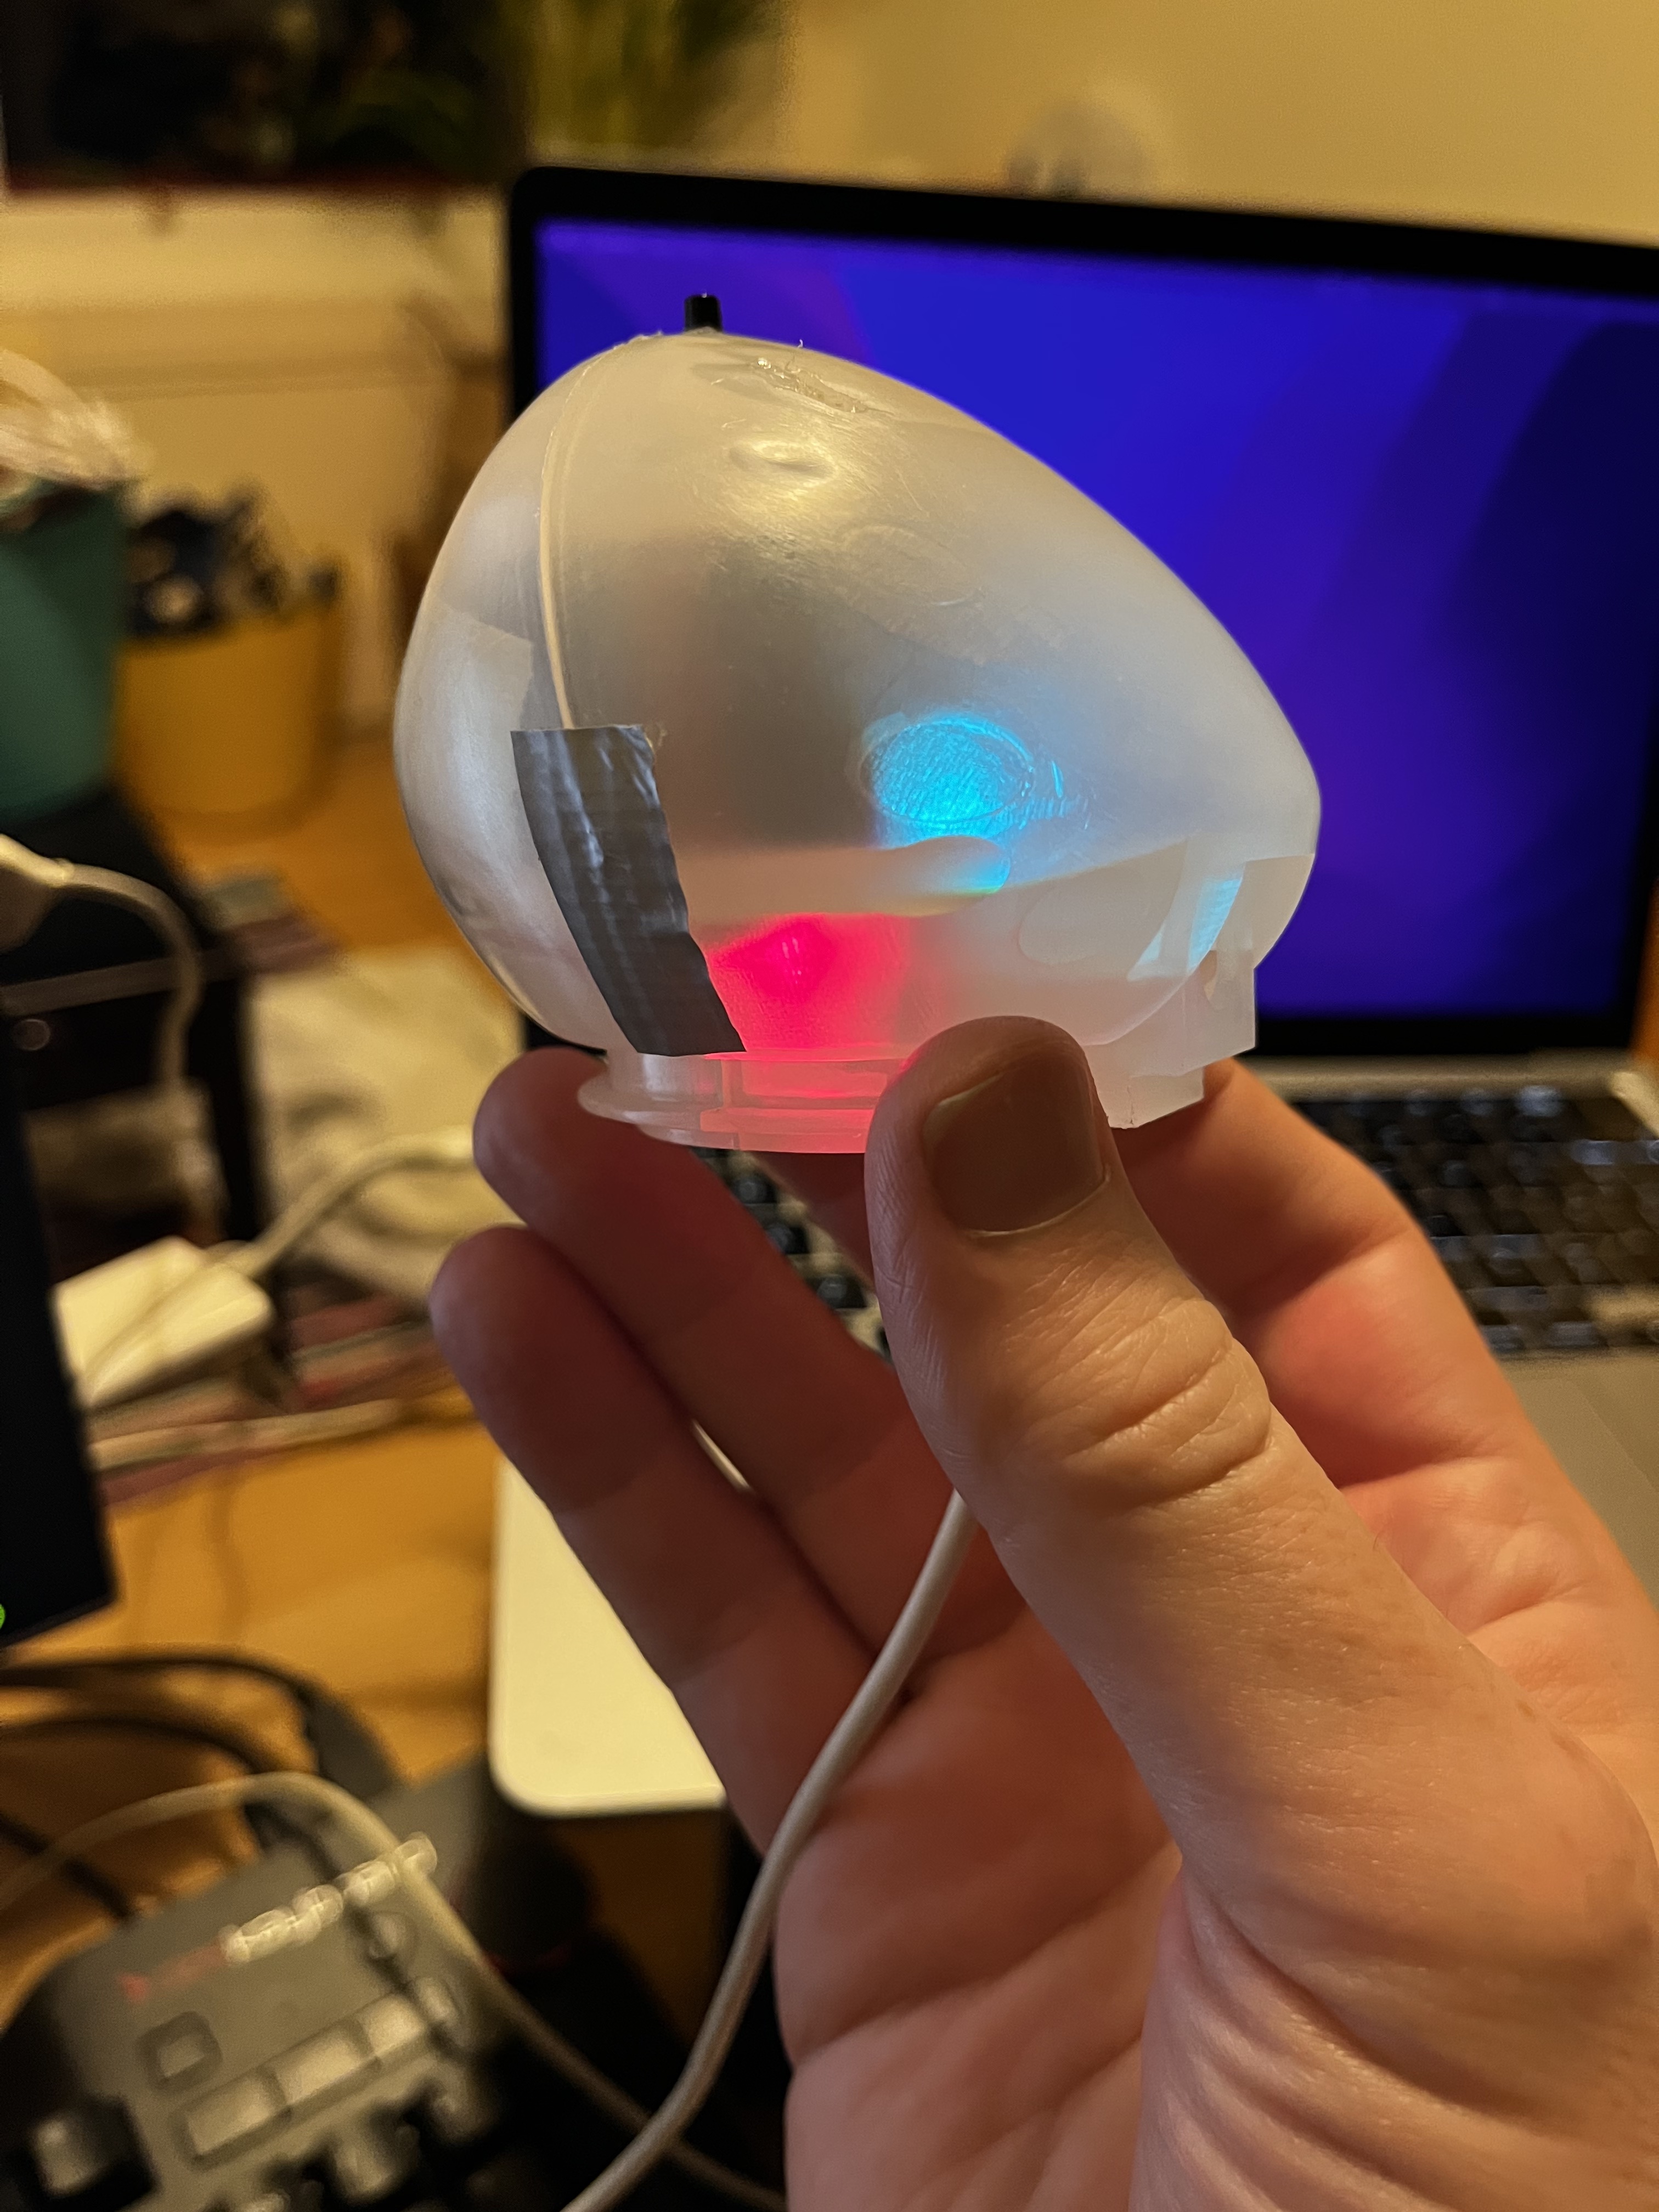
IoT Button
I've done a lot of projects over the holidays. This is a quick collection of notes to remind myself later.
I took the insides out of an old IKEA Spøka nightlight and squeezed in a Particle Photon, a battery shield and a battery then soldered the nightlight's on/off switch onto some jumper cables and wired that in. I now have an internet-connected button that looks cute.
Still no idea what to do with it but it’s fun.
Here's the code that's running on the Photon:
int led = D7; // Built-in LED
int pushButton = D6; // Old Spøka momentary switch
bool wasUp = true;
void setup() { pinMode(led, OUTPUT); pinMode(pushButton, INPUT_PULLUP); }
void loop() { int pushButtonState;
pushButtonState = digitalRead(pushButton);
if(pushButtonState == LOW) { // If we push down on the push button digitalWrite(led, HIGH); // Turn ON the LED if(wasUp) { Particle.publish("Spooky pressed"); wasUp = false; } } else { digitalWrite(led, LOW); // Turn OFF the LED wasUp = true; }
}
When you press the button, you get a message published to the Particle Cloud.
-
HERE Maps Web Component
At the weekend, I found myself starting another little side project that needed a map. And, predictably, I chose to use a HERE map.
In my day job, I use a lot of Vue but I do tend to prefer web components where possible, wrapping them in Vue only where necessary. This, then, is the natural outcome:
Now I can embed HERE maps with a single web component.
<here-map api-key="1234-54321"
  latitude="52.5"
  longitude="13.4"
  zoom="12"
></here-map>
Or include markers directly:
<here-map api-key="1234-54321" latitude="52.5" longitude="13.4" zoom="12"> <here-map-marker latitude="52.5" longitude="13.4" /> <here-map-marker latitude="52.501" longitude="13.405" icon="https://cdn3.iconfinder.com/data/icons/tourism/eiffel200.png" /> </here-map> -
Tape EP
I've been on a bit of a 70s/80s funk/soul organ thing recently. Think 'Vulfpeck' plays the 'Theme from Hill Street Blues'…