-
-
Latest 140byt.es offerings
Long-term readers (a.k.a. my Mum) might remember my JS1K efforts last year and the subsequent discussion of Extreme JS Minification. The same kind of mindset that inspired qfox to create that competition also inspired Jed to create 140 Bytes. As with JS1K, the clue is in the name, you have the length of a tweet – 140 characters – to create something cool or clever in JS.
I won't go into any more detail here, if you're interested, you've either already heard about it or would do better clicking around the 140bytes site or reading the comments on the master gist.
My entries
Following last week's draggable file script, I started messing about with making it small enough to qualify and, predictably, got hooked. Here are four I made last weekend.
Create a draggable file on-the-fly
The code from last week shrunk down.
Detect Doctype
There's no simple way to access the current document's doctype as a string. There is already a
document.doctypeobject so you might expect (or, at least I'd expect) you could do a.toString()or.asDoctypeStringor something like that. Nope. Nothing. You have to manually recreate it as a concatenation of properties. A quick discussion with kirbysayshi and mmarcon came up with a few alternative methods (Max's is quite devious, actually) before eventually culminating in this.Chainify and Propertize
This began as a very minimal implementation of Lea Verou's Chainvas. The idea is to enhance various constructors (Element, Node, etc.) so that each method returns the original object. This means that you can then chain (jQuery-style) any built-in function. Each constructor is also enhanced with a .prop function which allows property setting in a similarly chainable manner. For a better description, read through the Chainvas site.
-
Homemade Lanyard
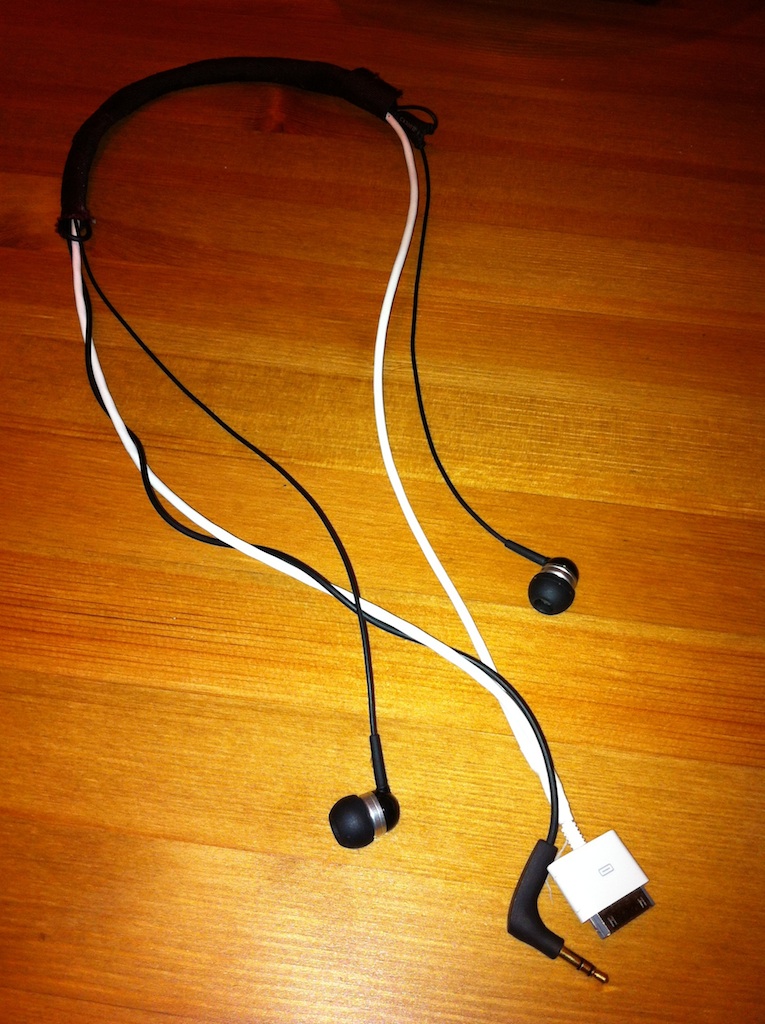
I'm currently looking for new earphones as my Klipsch ones finally gave out on me last week. Until I get some (Christmas is coming, after all), I decided to rummage around in my 'retired headphones' box (everyone's got one, no?) and found this:
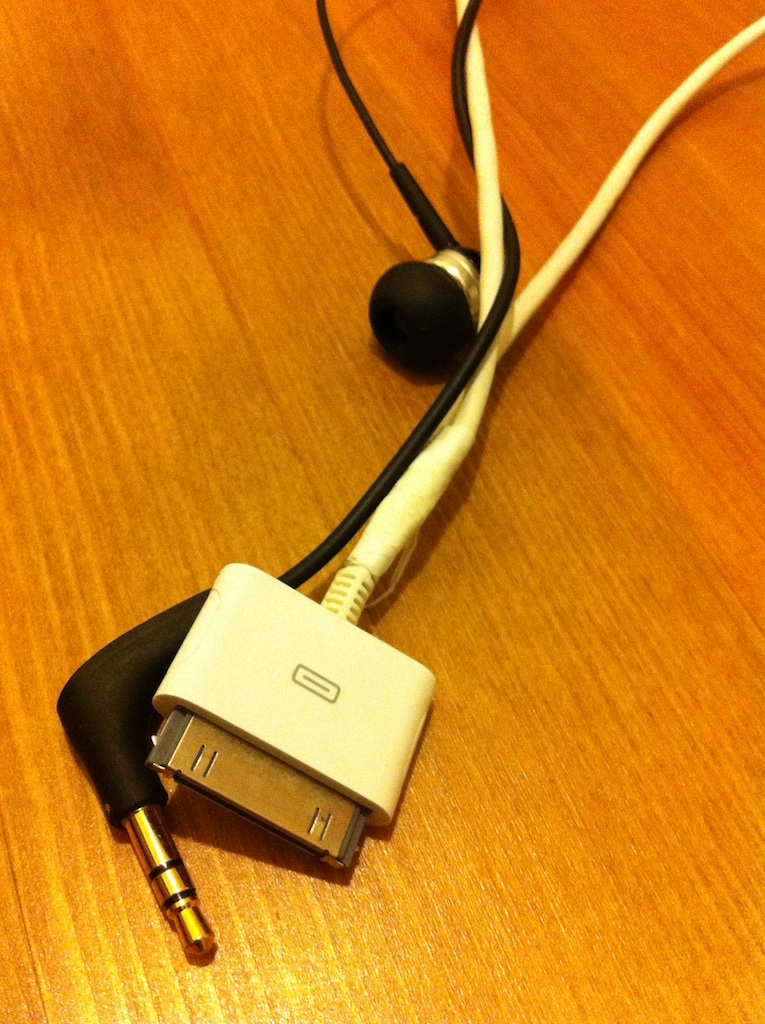
Back when I was using my second generation iPod nano, I needed something that combined the usefulness of the lanyard attachment but with good quality headphones. As I couldn't find anything, I got a pair of Sennheiser CX300s, an old USB connector cable and a metre of red ribbon and made my own. Once the USB end was cut off, I looped it round and glued it ends together then wrapped the join in plumbers' PTFE tape to seal it. The headphones were wired round, fastened with cable ties and then sewn together with the ribbon to make the neck bit comfortable. The iPod connector has two little clips in it which was plenty to hold the lightweight iPod Nano in place under my t-shirt and on that model, the headphone jack was on the bottom so the whole thing clipped together nicely.
The sound quality was as good as you'd expect from Sennheisers and I actually surprised myself with the build quality when I had to, yesterday, dismantle them after almost 4 years. Unfortunately, the iPhone 4 is a little bit too chunky to wear under a t-shirt. I got some odd looks when I tried.
-
jQuery Detach Scrollbars Plugin
A design I recently worked on called for a scrollbar which only took up half the height of the area it was scrolling. Now, I'm not going to get into a discussion about scroll behaviour, accepted standards or user expectations - fascinating though that would be - instead, Here's a jquery plugin.
The existing jQuery plugins I found that dealt with scrollbars created their own custom, themable bars. jScrollpane, for instance, gives you complete control over pretty much every aspect of the look and feel of the scrollbar. I figured this was too much for my needs, all I wanted was to be able to anchor the scrollbar to a given corner and change its height. The resulting plugin does just that. It even handles OS X Lion's disappearing scrollbars natively, too.
Usage
Note: This currently only works on vertical scrolling and doesn't have a good jQuery setup and teardown. If I needed it more than once on a page, I'd have written it a bit more robustly so it could be used more than once. Maybe I'll leave that task as an exercise for the enthusiastic reader.
If you call the plugin on an element with a scrollbar (i.e. the element has height and contains content that overflows), it will duplicate the scrollbar using the standard browser scrollbar and get rid of the original one. In fact, in its default configuration, there's pretty much no difference between using the plugin and not using it.
$(element).detachScrollbar();It becomes more useful, however, when you pass in a couple of options. This example will move the scrollbar to the left of the content area:
$(element).detachScrollbar({anchor : 'topleft'});You could leave the scrollbar on the right but shrink it downwards:
$(element).detachScrollbar({anchor : 'bottomright', height : '50%'});The only behaviour of a standard scrollable area that isn't replicated by default is being able to use the mouse wheel to scroll while over the content area. If you want this behaviour (and you probably do), all you need to do is include the jQuery Mousewheel plugin in your page. This script will recognise if it's available and enable the functionality.
How it works
The script creates a container div around the original scrollable content and sets that to
overflow:hiddenwhile setting the original area toheight:auto. This means that the original scrollbar disappears. It then creates another invisible div the same height as the original content and wraps that in a div withoverflow-y:scroll, this creates a scrollbar that looks exactly like the original one. Add in some clever event trickery to tie the scroll position of one to the scroll position of the other and we're done. We've replicated the original functionality but can now control the styles applied to the scrollbar completely separately from the original content. This means we can position it to the left or above, maybe add a 90° CSS transform and have it look like a horizontal scrollbar, anything you like.The plugin also incorporates “Cowboy” Ben Alman's scrollbar width plugin to make sure we're matching dimensions on whatever platform this is used on.
The options that can be passed in are:
internal: true / false (default: true)
autoposition: true / false (default: true)
anchor: 'topleft' / 'topright' / 'bottomleft' / 'bottomright' (default: 'topright')
height: Any CSS length (default '100%')
Advanced usage
The
autopositionoption allows you to decide whether to let the plugin handle the layout (which you probably do for most cases) or whether you want to specify everything yourself using the provided classes as styling hooks.The other option,
internal, determines the DOM structure. Specifically, it says whether everything is contained within the one element or whether the scrollbar is separate. Specifyinginternal: falsewould allow you to put the scrollbar anywhere on your page. You could have all scrollbars set asposition: fixedalong the top of the page if you wanted. Not sure why you would but you could.Example and Download
-
Create a draggable file on-the-fly with JS
Here's a useful little code snippet if you're building a web application. It's a simple way of making the boundary between web-browser and platform a bit smaller. It allows you to create a file (text, html, whatever) in in your page which the user can drag onto their desktop (if their browser supports the dragstart event and dataTransfer methods).
document.getElementById('downloadElement').addEventListener("dragstart", function (e) {
  e.dataTransfer.setData("DownloadURL", "text/html:filename.html:data:image/png;base64," + btoa(fileContent));
});
A description of the code:
- attach an event listener to the draggable element you specify (
downloadElement) - when you start to drag it (
dragstart), - it creates a dataTransfer object (with the type
DownloadURL) - and sets the content of that to be whatever you pass it (
fileContent) - It uses
btoa()to encode the string data as a base64-encoded string. - When you combine this with the MIME-type (
text/html), - you can create a file with the specified name (
filename.html) when the user releases the drag in their local file system. - The fake MIME-type (
image/png) is there as part of the object data to convince the browser this is a binary file (which it is, even though it's not an image).
Credit goes to Paul Kinlan for using this in Appmator which is where I first saw this done this way. He actually uses it alongside some extremely clever JS zip-file creation stuff, too, it's definitely worth digging through the source there.
You can find out more about the drag events on the MDN.
- attach an event listener to the draggable element you specify (